Tutorial: build a weather app with React
This is a classic exercise or test when applying for a job

In this React tutorial for beginners, we are going to learn how to build a small and simple React app to display the weather of cities in the world. If you are interested in learning React, this beginner tutorial is a good starting point, as it doesn't cover very complex topics. At the same time, once you learn how to connect to an external API and display the results, it can be quite handy to build other types of single-page apps whose only requirement is to fetch data from an external source and display the results in any way.
It's a very simple app that can be coded in a few hours, so you should try to do it by yourself. That's how you will learn more! For the impatient ones... here is the source code.
Functional requirements
- Display the city name, current weather icon, temperature, humidity and wind speed
- The background color changes based on the temperature
- Loads a city name using the query string '?city=Madrid'
- Loads comma-separated cities and rotates them after 5s
- Cache the API data and refresh it after 5m
- Responsive design. It should work well on all devices
Tech stack
- Cross-browser compatible back to Internet Explorer 9
- Don't use jQuery
- Use the League Gothic font
- Use the weather icons from Erik Flowers
- Use the data from Open Weather Map
- Use Node.js and Bower
- Use the Gulp Task Runner and the SASS CSS pre-processor
- Use Browserify to require modules
Note: due to the simplicity and small size of the architecture, we will omit the use of BEM and ITCSS.
This is what the app should look like by the end of the tutorial:
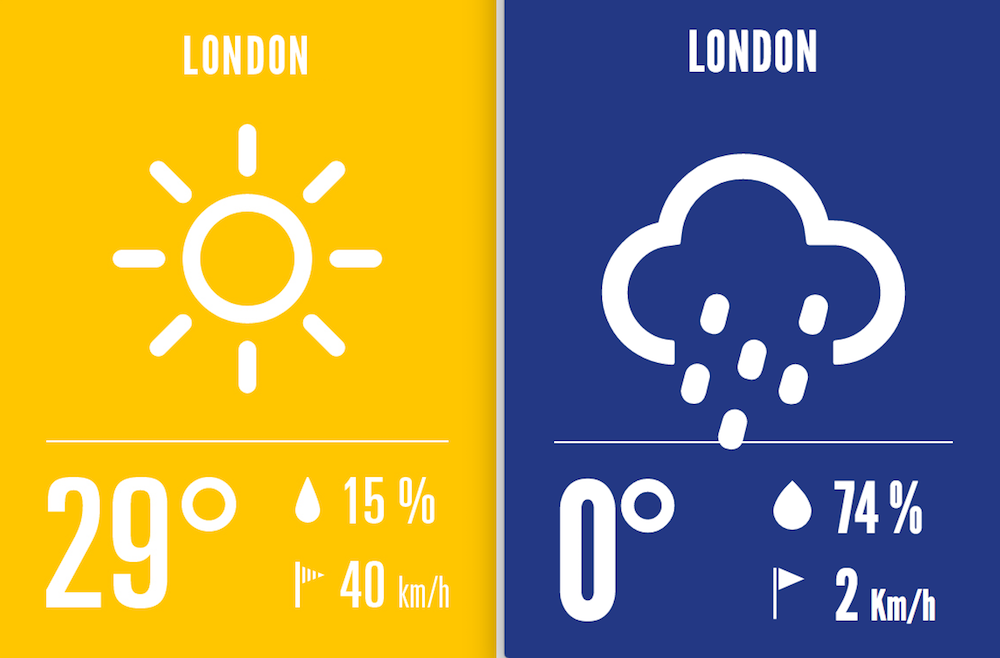
There can be a few differences in the icons or the font (3rd party dependencies), but the general look and feel will be very similar to any of these two screenshots.
Step 1. Setup the dev environment
The first thing we are going to do is install Node.js. I'm going to be using the Mac Os terminal, Brackets and Chrome. You can use whichever tools or operating system you prefer, all you need is a console, a text editor and a browser.
If you decide to use Brackets, I recommend installing also these extensions:
- Brackets icons (to display nice icons beside the files)
- HTMLHint (adds hints to the HTML tags)
- Monokai theme (based on the Sublime Text monokai color scheme)
- React JSX language mode (Adds the JSX language mode)
- Tabs custom (adds tabs to Brackets)
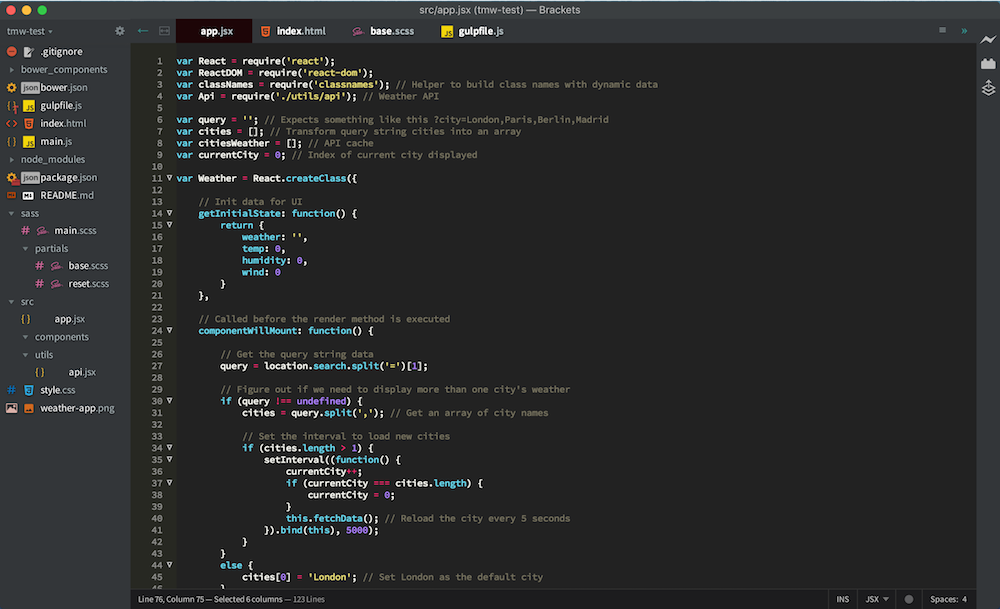
This is how my Brackets looks like with all these extensions installed:
Step 2. Conceptual aside: about Node.js modules
As you probably already know, the fundamental Node building block is called a module that maps directly to a file and everything within that module is private (vars only work in that file).
Now, before we look at how to expose things out of a module, let's look at loading a module. This is where 'require' comes in. 'require' is used to load a module, which is why its returned value is typically assigned to a variable:
var moduleA = require('./filenameA');
As long as our module doesn't expose anything, the above isn't very useful. To expose things we use 'module.exports' and export everything we want. We can export objects or primitives in different ways:
var User = function(name, email) { ... }
module.exports = User;
module.exports = function(name, email) { ... }
var x = 5;
module.exports.x = x;
In this app, we are only going to create one module, the API module (api.jsx), which is going to be taking care of fetching the data from the Weather API. We will talk about it more in detail later.
Step 3. Installing NPM and Bower modules
NPM is a package manager that comes with Node.js. It's very useful to install 3rd party Node.js modules that we can use to speed up our development.
NPM uses a file called package.json as a reference for all the dependencies that the project is going to have. We can create this file manually or by typing 'npm init'.
Let's start by creating a folder called 'react-weather' whichever you prefer on your computer.
Then open the console/terminal, cd to that folder and type npm init. You will be prompted with a few questions which we don't need to answer. Just keep pressing enter until you exit the process.
Now you should have a package.json file in your folder.
Next, we are going to download a few packages (which will be saved automatically in the 'node_modules' folder) and save the reference in the package.json file:
Use npm install <pkg> --save afterward to install a package and save it as a dependency in the package.json file.
We can also download several packages at the same time. So type the following:
npm install --save browserify classnames gulp gulp-concat gulp-react gulp-sass gulp-server-livereload gulp-util gulp-watch node-notifier react react-dom reactify vinyl-source-stream watchify whatwg-fetch
We are also going to install the gulp client globally (not only for this project). We use the option '-g'. We might need to give admin rights using 'sudo':
sudo npm install -g gulp-cli
It might take a while..., but you should end up with a package.json that looks like this:
{
  "name": "react-weather",
  "version": "1.0.0",
  "main": "index.js",
  "scripts": {
    "test": "echo \"Error: no test specified\" && exit 1"
  },
  "author": "",
  "license": "ISC",
  "dependencies": {
    "browserify": "^9.0.3",
    "classnames": "^2.2.3",
    "gulp": "^3.8.11",
    "gulp-concat": "^2.5.2",
    "gulp-react": "^3.0.1",
    "gulp-sass": "^2.0.1",
    "gulp-server-livereload": "1.3.0",
    "gulp-util": "^3.0.4",
    "gulp-watch": "^4.2.4",
    "node-notifier": "^4.2.1",
    "react": "^0.14.3",
    "react-dom": "^0.14.3",
    "reactify": "^1.1.0",
    "vinyl-source-stream": "^1.1.0",
    "watchify": "^2.4.0",
    "whatwg-fetch": "^0.11.0"
  },
  "devDependencies": {}
}
Next, we are going to install Bower (another package manager for the web) and download the weather icons. It will create a folder called 'bower_components' and a registry file called 'bower.json':
npm install -g bower
bower install weather-icons
If we were to upload this project into a Git code repository, we would have to create a '.gitignore' file and add 'node_modules/' and 'bower_components/' to it, as we don't want to upload all these dependencies to the repository. New users could type 'npm install' and 'bower install' to download all the dependencies.
Step 4. Folder structure and placeholders
We are going to create a few folders and files. We should end up with the following folder structure:
/react-weather
    bower.json
    package.json
    gulpfile.js
    index.html
    /bower_components
    /node_modules
    /sass
        main.scss
        /partials
            base.scss
            reset.scss
    /src
        app.jsx
        /utils
            api.jsx
The new files are:
- gulpfile.js: this is where we will define the tasks to be run, like compiling SASS and JSX, bundling the code, watching for changes, reloading the browser, etc
- index.html: a very minimal markup for our app
- main.scss: we will use it to set the order in which we want to load the SASS files
- base.scss: all our CSS styles
- reset.scss: basic resetting CSS rules
- app.jsx: the core of our app
- api.jsx: the module to contact the Weather API
Step 5. Setup Gulp tasks
When talking about React, we are not only looking at the framework itself. We are also learning about the tools that will help us have a smooth and agile development experience. That's when a task runner becomes your best friend :-) Gulp is a task runner, just like Grunt. I don't have any particular preference for Gulp, actually, I am more used to working with Grunt, but for the sake of learning and trying new things, we are going to use Gulp in this tutorial.
First, we are going to start by opening the gulpfile.js in the editor and requiring the dependencies:
var gulp = require('gulp');
var gutil = require('gulp-util');
var source = require('vinyl-source-stream');
var browserify = require('browserify');
var watchify = require('watchify');
var reactify = require('reactify');
var notifier = require('node-notifier');
var server = require('gulp-server-livereload');
var concat = require('gulp-concat');
var sass = require('gulp-sass');
var watch = require('gulp-watch');
As we mentioned before, we need to compile the SASS and JSX files, bundle the code and watch for changes. We also want to display formatted errors and reload the browser automatically when there's a change in the JS or SASS files.
Let's start with the error messages:
// Format error messages
var notify = function (error) {
    var message = 'In: ';
    var title = 'Error: ';

    if (error.description) {
        title += error.description;
    }
    else if (error.message) {
        title += error.message;
    }

    if (error.filename) {
        var file = error.filename.split('/');
        message += file[file.length-1];
    }

    if (error.lineNumber) {
        message += '\nOn Line: ' + error.lineNumber;
    }

    notifier.notify({title: title, message: message});
};
The module 'node-notifier' creates nice alerts (at least in Mac Os) with the error messages that occurred during the build process. With the snippet above, we are just formatting the error message in a way that could be more readable.
The next step is to create the bundle. For this part, we are going to need three modules: watchify, browserify and reactify. The first one is a module to do automatic bundling of browserify-based scripts.
Browserify lets us require('modules') in the browser by bundling up all our dependencies. It looks at a single JavaScript file (in this case app.jsx), and follows the require dependency tree, and bundles them into a new file.
ReactJS uses a special syntax called JSX, not the normal JS one. Usually, when you want to work with ReactJS JSX files, you need to transform them into normal JS files. So we are going to use 'reactify' to transform those JSX into JS files.
In conclusion, we will create a Browserify bundler and add a transformer to transform JSX to Javascript and then bundle everything together into a file called main.js that will sit in the root.
// Bundle settings
var bundler = watchify(browserify({
    entries: ['./src/app.jsx'],
    transform: [reactify],
    extensions: ['.jsx'],
    debug: true,
    cache: {},
    packageCache: {},
    fullPaths: true
}));

// Bundle tasks
function bundle() {
    return bundler
        .bundle()
        .on('error', notify)
        .pipe(source('main.js'))
        .pipe(gulp.dest('./'))
}
bundler.on('update', bundle);

// Create bundle
gulp.task('build', function() {
    bundle()
});
Now we are going to process the SASS files and put them all together (in the order specified in main.scss) in a unique CSS file (style.css) that will sit in the root folder:
// Compile the SASS files from main.scss
gulp.task('sass', function () {
    gulp.src('./sass/main.scss')
        .pipe(sass().on('error', sass.logError))
        .pipe(concat('style.css'))
        .pipe(gulp.dest('./'));
});
The next stage is to set up the live reload server. This module will reload the browser automatically each time there's a change in our code. This is a really nice feature! In this case, we are going to pass a test filter to the livereload module, so that it will check our compiled CSS and JS files before reloading the browser. You can read more about the module documentation here.
// Live reload server settings
gulp.task('serve', function(done) {
    gulp.src('')
        .pipe(server({
            livereload: {
                enable: true,
                filter: function(filePath, cb) {
                if (/main.js/.test(filePath)) {
                    cb(true)
                }
                else if (/style.css/.test(filePath)) {
                    cb(true)
                }
            }
        },
        open: true
    }));
});
Finally, we are going to create the watch task for our SASS files and set the order in which all the created tasks need to be run:
// Watch for changes in the SASS files
gulp.task('watch', function () {
    gulp.watch('./sass/**/*.scss', ['sass']);
});

// Run tasks in a specific order
gulp.task('default', ['build', 'serve', 'sass', 'watch']);
At this point, if you are using Git, you should add main.js and style.css to your .gitignore file, as these files will be generated by Gulp and we don't need them in the repository.
Step 6. Create a basic markup
We are going to create a basic HTML file with:
- A container DIV where we will attach the React component
- The font loaded from Adobe Edge Fonts
- The compiled CSS file
- The weather icons CSS file
- The compiled JS file
I prefer to load fonts using <link> rather than a <script> tag, but for the sake of simplicity, we will go with this method this time.
<html>
    <head>
        <script src="//use.edgefonts.net/league-gothic:n4:all.js"></script>
        <link rel="stylesheet" href="/style.css">
        <link rel="stylesheet" href="/bower_components/weather-icons/css/weather-icons.min.css">
    </head>
    <body>
        <div class="container"></div>
    </body>
    <script src="main.js"></script>
</html>
Step 7. Add the reset CSS
Just copy/paste the following code in /sass/partials/reset.scss
html {
  box-sizing: border-box;
}

*, *:before, *:after {
  box-sizing: inherit;
}

html, body, div, span, applet, object, iframe, h1, h2, h3, h4, h5, h6, p, blockquote, pre, a, abbr, acronym, address, big, cite, code, del, dfn, em, img, ins, kbd, q, s, samp, small, strike, strong, sub, sup, tt, var, b, u, i, center, dl, dt, dd, ol, ul, li, fieldset, form, label, legend, table, caption, tbody, tfoot, thead, tr, th, td, article, aside, canvas, details, embed, figure, figcaption, footer, header, hgroup, menu, nav, output, ruby, section, summary, time, mark, audio, video {
  margin: 0;
  padding: 0;
  border: 0;
  font-size: 100%;
  font: inherit;
  vertical-align: baseline; }

/* HTML5 display-role reset for older browsers */

article, aside, details, figcaption, figure, footer, header, hgroup, menu, nav, section {
  display: block; }

body {
  line-height: 1; }

ol, ul {
  list-style: none; }

blockquote, q {
  quotes: none; }

blockquote {
  &:before, &:after {
    content: '';
    content: none; } }

q {
  &:before, &:after {
    content: '';
    content: none; } }

table {
  border-collapse: collapse;
  border-spacing: 0; }
Step 8. Start building the React component
Finally, we arrive at the moment where you can really start learning React! I'm sorry it took so long, but now we have everything ready and from now on it will be just pure coding :P
First we are going to open /src/app.jsx. This is where we will create our React component. We need to require some modules:
var React = require('react');
var ReactDOM = require('react-dom');
var classNames = require('classnames');
var Api = require('./utils/api');
The two first modules correspond to the React framework. Classname is a 3rd party module (recommended by React) to build class names that contain dynamic data. In JSX we cannot use '+' like in JS to concatenate strings in the class attribute. The API object is requiring the module that we will use to fetch data from the Weather API. Notice that to load this module, we have to build the relative path, as it's not a module that we have installed with NPM.
Now we are going to define a few variables to handle the cities from the query string:
var query = ''; // Expects something like this ?city=London,Paris,Berlin,Madrid
var cities = []; // Transform query string cities into an array
var citiesWeather = []; // API cache
var currentCity = 0; // Index of current city displayed
Let's not go too deep in trying to explain what we are going to do with these variables. Their purpose will be revealed as we go along building the component.
Now we can define the new React component like this:
var Weather = React.createClass({
    render: function() {

    }
});

// Assign the React component to a DOM element
var element = React.createElement(Weather, {});
ReactDOM.render(element, document.querySelector('.container'));
We basically created a React component called 'Weather' and render it inside the 'container' DIV.
From now on, we are going to work on the methods of the object defined inside the React.createClass().
First method is getInitialState():
// Init data for UI
getInitialState: function() {
    return {
        weather: '',
        temp: 0,
        humidity: 0,
        wind: 0
    }
},
Here, we are just initializing the props that we are going to use later to hold the values for our weather indicators in the UI.
Now we need to create the HTML structure for our weather component Let's use this simple wireframe to map each box into an HTML element:

Inside the render() method, add the following:
// Build class names with dynamic data
var weatherClass = classNames('wi wi-owm-' + this.state.weather);
var bgColorClass = 'weather-widget '; // very-warm, warm, normal, cold, very-cold
// Set the background colour based on the temperature
if (this.state.temp >= 30) {
bgColorClass += 'very-warm';
}
else if (this.state.temp > 20 && this.state.temp < 30) {
bgColorClass += 'warm';
}
else if (this.state.temp > 10 && this.state.temp < 20) {
bgColorClass += 'normal';
}
else if (this.state.temp > 0 && this.state.temp < 10) {
bgColorClass += 'cold';
}
else if (this.state.temp <= 0) {
bgColorClass += 'very-cold';
}
// Render the DOM elements
return <div className={bgColorClass}>
<h1 className="city">{cities[currentCity]}</h1>
<div className="weather">
<i className={weatherClass}></i>
</div>
<section className="weather-details">
<div className="temp"><span className="temp-number">{this.state.temp}</span><span className="wi wi-degrees"></span></div>
<div className="humidity"><i className="wi wi-raindrop"></i>{this.state.humidity} %</div>
<div className="wind"><i className="wi wi-small-craft-advisory"></i>{this.state.wind} <span className="vel">Km/h</span></div>
</section>
</div>
Let's analyze the code step by step.
To render the big weather icon (the sun, clouds, etc), we need to get the icon ID from the Weather API. Once we have it, we can use the prefix 'wi wi-owm-' (got it from the weather icons API compatibility list) to compose the class name that we need. That's what we are doing with the weatherClass variable.
The next variable, 'bgColorClass' is composing the class name that we will use for the app wrapper background color. The aim is to have the class 'warm' for temperatures between 20 and 30 degrees and so on. We will then assign a color to each class later in the SASS file.
In the return statement, the first thing that stands out is the use of 'className' rather than 'class'. That's how you add CSS classes in JSX templates. The class names also need to be composed using the classNames module that we required at the beginning of the file.
Then we have variables wrapped in {}, like in Handlebars. This is how we render the content of React variables, states or properties (called props). In this app, we are going to use states. If you want to know more about the difference between props and states, head to this article.
Step 9. Fetch the API data
Let's summarise. So far, we have a React component that initializes and renders its empty data. That's all. So, the next step is to fetch the API data and pass it on to the React component.
Let's open the /src/utils/api.jsx file and write the following code:
var Fetch = require('whatwg-fetch');
var rootUrl = 'http://api.openweathermap.org/data/2.5/weather?q=';
var apiUrl = '&appid=2de143494c0b295cca9337e1e96b00e0';

module.exports = {
    get: function(place) {
        return fetch(rootUrl + place + apiUrl, {
            headers: {
                // No need for special headers
            }
        })
        .then(function(response) {
            return response.json();
        });
    }
};
In this module, we are going to require 'whatwg-fetch', which is a window.fetch JavaScript polyfill. We are also going to use an API key and the API URL. I think you don't need to register to generate a new key, as this one I got it from the API docs and seems to be working fine.
The fetching code is super simple. We compose the final URL by concatenating the variables plus the city's name that we receive as a parameter and pass it to the fetch method. Then we have a 'promise' that will receive the response from the API and we just return it in JSON format.
Step 10. Connect the API module with the React component
Back in /src/app.jsx, we are going to create a new method called 'fetchData' that will try to load the data from our cache and if it cannot find it, then it will call the module we created in the previous step to get new data:
fetchData: function() {

    // Get the data from the cache if possible
    if (citiesWeather[currentCity]) {
        this.updateData();
    }
    else {
        // Request new data to the API
        Api.get(cities[currentCity])
            .then(function(data) {
                citiesWeather[currentCity] = data;
                this.updateData();
        }.bind(this));
    }
},
The array citiesWeather is our cache object. We are going to store here the JSON responses that we get from the API. Why are we doing this? Because when we have a list of cities rotating, we don't want to keep contacting the API every time we change the city.
When we want to request new data, we just call the get method in the API module and pass the current city name. In the 'promise', we make sure to update the cache object with the data received and we call the updateData method to set the new value in the states.
Step 11. Update the states
At this point, the React component has just received new data from the API and it's ready to update the UI with this new data. We are going to create a new method called updateData:
updateData: function() {
    // Update the data for the UI
    this.setState({
        weather: citiesWeather[currentCity].weather[0].id,
        temp: Math.round(citiesWeather[currentCity].main.temp - 273.15), // Kelvin to Celcius
        humidity: Math.round(citiesWeather[currentCity].main.humidity),
        wind: Math.round(citiesWeather[currentCity].wind.speed)
    });
}
Modifying this.props or this.state directly is not a good idea, because React will not be able to pick up on the changes. That's because React does a shallow comparison of your post prop to determine if it has changed. So always use 'setState'.
Step 12. Read the query string and create the timers
Before we start with the styling of the app, there's one more step we have to tackle. We are going to create a new method called componentWillMount(), which is called before the render method is executed:
// Called before the render method is executed
componentWillMount: function() {

    // Get the query string data
    query = location.search.split('=')[1];

    // Figure out if we need to display more than one city's weather
    if (query !== undefined) {
        cities = query.split(','); // Get an array of city names

        // Set the interval to load new cities
        if (cities.length > 1) {
            setInterval((function() {
                currentCity++;
                if (currentCity === cities.length) {
                    currentCity = 0;
                }
                this.fetchData(); // Reload the city every 5 seconds
            }).bind(this), 5000);
        }
    }
    else {
        cities[0] = 'London'; // Set London as the default city
    }

    // Create a timer to clear the cache after 5 minutes, so we can get updated data from the API
    setInterval(function() {
        citiesWeather = []; // Empty the cache
    }, (1000*60*5));

    this.fetchData();
},
There's a module called React Router that can be very useful for building single-page apps, but for the sake of simplicity, I decided not to include it. So we are going to use a very simple approach for reading the list of cities: a query string.
In the first lines of the snippet above, we are just splitting the string into an array and checking if the user entered a single city or several separated by commas. If we have several, then we create a timer that will call the fetchData() method every 5 seconds, which will update the data of the current city. Notice that we are also passing the execution context of the React component to the timer, otherwise 'this' wouldn't find the fetchData method.
In the second part of the snippet, we are creating another timer that will be in charge of clearing the cache every 5 minutes, otherwise, we would only get LIVE data once (when we launch the app).
Congratulations, you arrived at the end of the Javascript part! Now let's quickly add the CSS and try to run the app.
Step 13. Add the SASS styles
Copy/paste the following code into /sass/partials/base.scss:
// Colours
$very-warm: #FF8500;
$warm: #ffc600;
$normal: #94AF10;
$cold: #06799F;
$very-cold: #233884;

// Breakpoints
$mobile-width: 500px;
@mixin mobile {
    @media (max-width: $mobile-width) {
        @content;
    }
}

// DOM Elements
.weather-widget {
    width: 100%;
    color: white;
    font-family: league-gothic, sans-serif;
    font-weight: 100;
    font-style: normal;
    padding: 5% 10%;

    @include mobile {
        padding: 2%;
    }

    &.very-warm { background-color: $very-warm; }
    &.warm { background-color: $warm; }
    &.normal { background-color: $normal; }
    &.cold { background-color: $cold; }
    &.very-cold { background-color: $very-cold; }
}

.city {
    font-size: 4em;
    text-transform: uppercase;
    letter-spacing: 2px;
    width: 100%;
    text-align: center;
}

.weather{
    display: table;
    height: 415px;
    width: 100%;
    text-align: center;
    border-bottom: 2px solid white;

    @include mobile {
        height: 350px;
    }

     .wi {
        display: table-cell;
        vertical-align: middle;
        font-size: 20em;

         @include mobile {
            font-size: 15em;
         }
    }
}

.weather-details {
    overflow: hidden;
    margin-top: 35px;
    max-width: 550px;
    margin-left: auto;
    margin-right: auto;

    .temp {
        font-size: 13.5em;
        float: left;
        width: 55%;
        max-height: 200px;

        @include mobile {
            font-size: 9em;
        }

        .temp-number, .wi {
            vertical-align: top;
            line-height: 0.85em;
        }

        .wi {
            font-size: 1.5em;
            line-height: 0.8em;
        }
    }

    .humidity, .wind {
        font-size: 5em;

        @include mobile {
            font-size: 3em;
        }

        .wi {
            vertical-align: top;
            width: 70px;

            @include mobile {
                width: 40px;
            }
        }
    }

    .humidity {
        margin-bottom: 20px;
    }

    .wind {
        .wi {
            font-size: 0.82em;
        }
        .vel {
            font-size: 0.6em;
        }
    }
}
The SASS code is quite self-explanatory. It can be improved, but for this tutorial, which is to learn React, I think it fulfills its purpose.
Step 14. The moment of truth
Type 'gulp' in the console/terminal and cross your fingers!
If it works, congratulations! if it doesn't, try to debug the error messages and find a fix. If you get stuck, then post a comment here and I will try to help you.
This was my first React app and I'm excited to continue learning about Flux, Reflux, the router, etc. So, please, send me your suggestions or let me know if the app could be improved in any way. Thanks and I hope you enjoyed it!
UPDATE: You DO need to create your own API Key and set it in the apiUrl variable in /src/utils/api.jsx, otherwise your requests will be blocked at some point.